Battery Substitutes for MTH Engines
Shared by Sam Dillon aka rrman on OGR Forum in November 2011
3 Volt - See assembly process here.
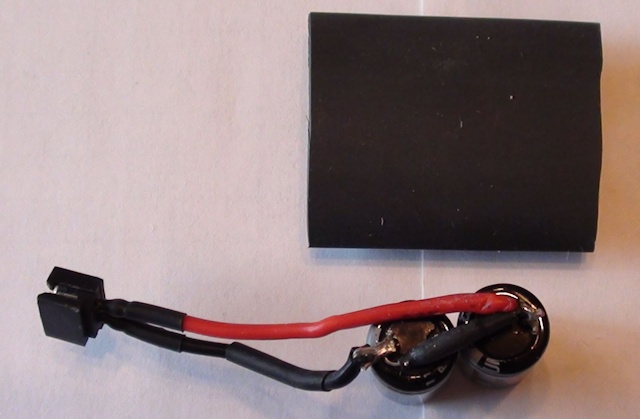
| More detailed view of 3V top connections |
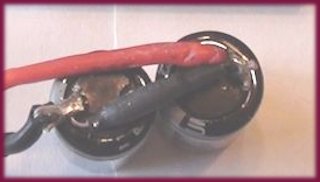 |
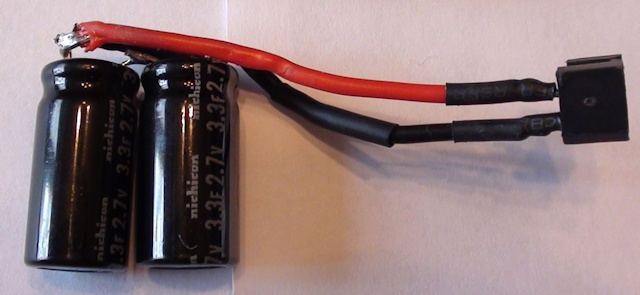
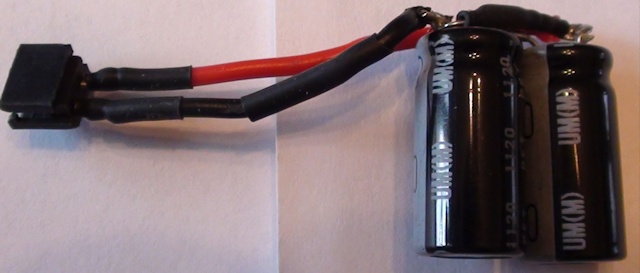
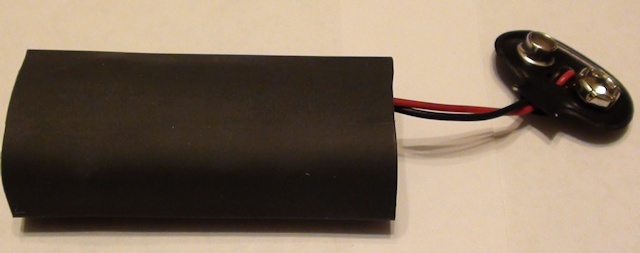
9 Volt
Mouser components:
For 9V cell:
4) 647-JUMT1335MPD $3.04ea $12.16 3.3F@ 2.7V capacitor
4) 78-1N5223B $0.07ea $ 0.28 2.7V zener diode
1) 534-81-8TB $0.35ea $ 0.35 9V battery connector with leads
TOTAL $12.79
Wire capacitors in series and placed a 1N5223B across each one, band
end towards capacitor +. Connected the 9V snap connector red wire to
negative and black wire to capacitor positive (because we are now
reversed in how current is flowing i.e. we are sourcing current
rather than receiving power.)
[See Q & A] Cover with 3/4" heat shrink tubing
and done.
Q & A Concerning Socket Polarity
Question - I am a little confused about the polarity. You say in the
directions:
"Connected the 9V snap connector red wire to negative and black wire
to capacitor positive (because we are now reversed in how current is
flowing i.e. we are sourcing current rather than receiving power.)"
for the 9 volt.
And for the 2.4 volt: "unsoldered connector wires then soldered red
lead to capacitor + and black lead to capacitor -"
The pictures show the same. This seems to me that one or the other
is incorrect.
Could you please verify which is correct?
Answer -
For Radio Shack 9V connector (or what ever generic off the shelf 9V
connector used), internally the red wire is connected to the snap
that goes to the battery + terminal, the black goes to connecter
snap that goes to battery - terminal. Because we are now using this
Radio Shack connector "backwards" to connect to our capacitor cell
to MTH 9V connector, we have to connect the capacitor cell +
terminal to the 9V connector black wire and connect the capacitor
cell - terminal to the 9V connector red wire. This is done so the
capacitor cell + polarity "lines up" with the MTH 9V connector +
snap, and the capacitor cell - polarity "lines up" with the MTH 9V
connector - snap.
For the 3V cells, I simply removed the connector with attached wires
from the battery + and - tabs then connected them to the capacitor
cell + and - respectively since this connector's polarity is already
correct for battery so it can be directly connected to the
respective capacitor cell terminals that functions as battery.