Toy Train Layout Wiring - Wire Management
| Basic | Intermediate | Advanced | Wire Management | Bus Wiring | 120V Train Room |
| Glossary | Wire Sizes | Switches | Load Calculations | Soldering | Troubleshooting |
Speed Wiring
After an area has track and/or accessories
installed, connect the power tap wires cut long enough to tap into
the home run terminal strips. Place terminal strips near
accessible edge of layout for quick and easy access.
Install terminal strips based on tap wire locations.
Pull home run wire to farthest point from power source and start
terminating wires at that farthest point. Leave slack in wires
to allow for repositioning terminal strips if needed. The
slack in tap wires also allows track/accessory movement. Work
your way back to power source and pull slack in home run wire as you
terminate home run and tap wires. The home run wires are not
cut until the central terminal strips are positioned.
TEST that area by running temporary power wires to the
central terminal strip.
By starting at the farthest connection, all needed power
feeds a identified as your work your way back.
The power and control panel area is assembled last when all
wire is pulled.
When running wire, always leave plenty of wire for
terminating and generous loops for slack. Toy train wiring
operates better if it isn't bunched together.
Identifying Wires
Color coding individual wires is the easiest way to identify one wire among many.
| The color code convention used by electricians for home
and office wiring is handy to use for toy train layouts.
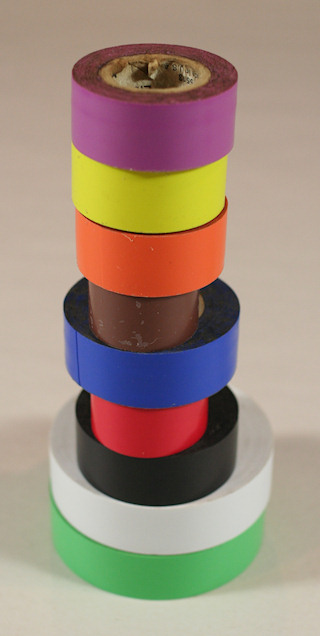
Use phase tape to identify circuit wires or buy 500' spools
of individual colors. The SSPRR Run Room is wired with this color code. Black red blue brown orange in large wire sizes are used for the main tracks. See the Control Panel below showing each track's color designation. White and grey are used for the common wires. Green is used for earth ground. Purple designates switched power. |
 |
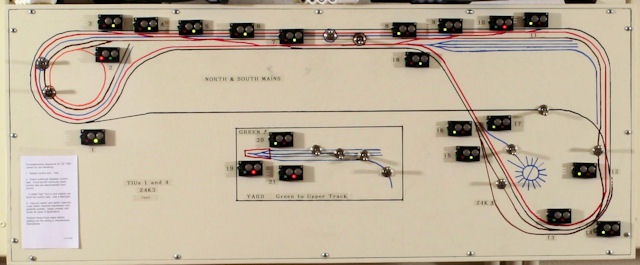
Main Control Panel for Main Level in Layout Tour with Track color that matches wire color.
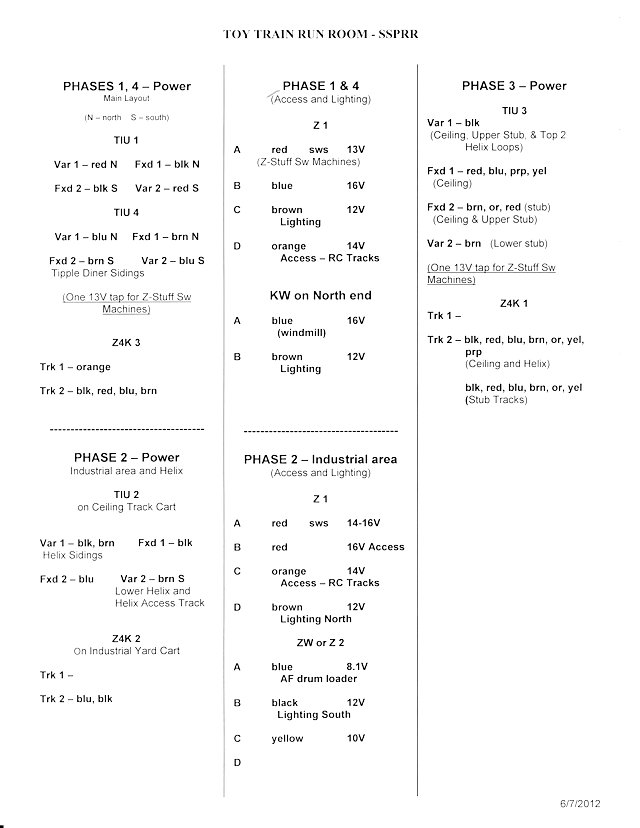
The SSPRR was constructed in 4 phases while transitioning from a small layout in the south end of the basement to the full basement Run Room. These index cards serve as my Master wiring reference and are stapled on the front edge of the tables where the terminal strips are mounted.
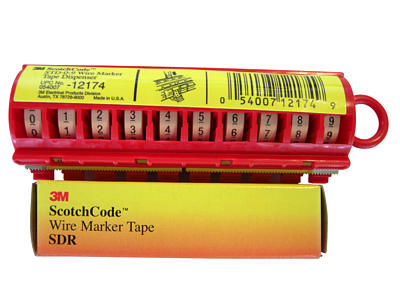
Alternate identification systems are white phase tape or 3M Products.
 |
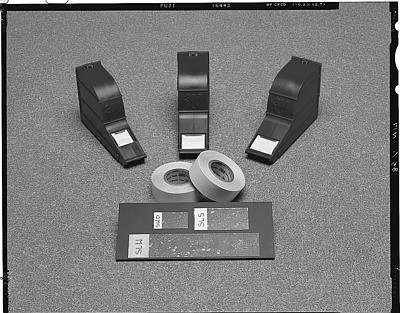 |
| 3M™ ScotchCode™ Wire Marker Tape - Numbered | 3M™ Scotchcode™ Wire Marker Write-On Dispenser |
Joining Wires
Positive wire connections guarantee trouble free operation. These products and practices keep the SSPRR operating with ease.
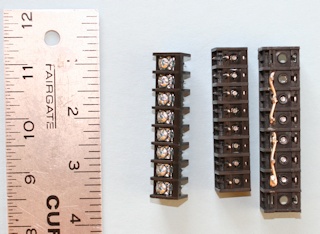
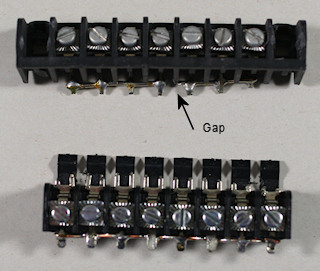
These Terminal Blocks are intended for
circuit board mounting. The prongs on the bottom can be used
to tie all the terminals together then make gaps as needed.
Remove the screw on the ends and mount blocks with drywall screws.
The block with the #22 wires is less than 1/2" wide and hangs from a
tie wire.
Position Terminal Blocks and other connectors toward the front of
the layout for easy access.
 |
 |
 #22 solid wires |
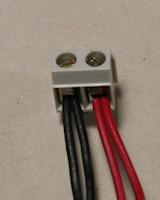
| Barrier Terminal Blocks can be purchased with 2 to 16 positions. Use blocks with screws that hold down a binding head. | Surplus electronic supply places frequently have surplus terminal strips. | These blocks have a screw clamp and are used for very small wires. |
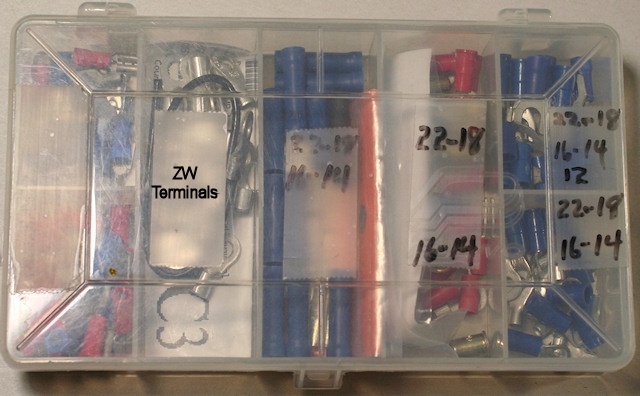 |
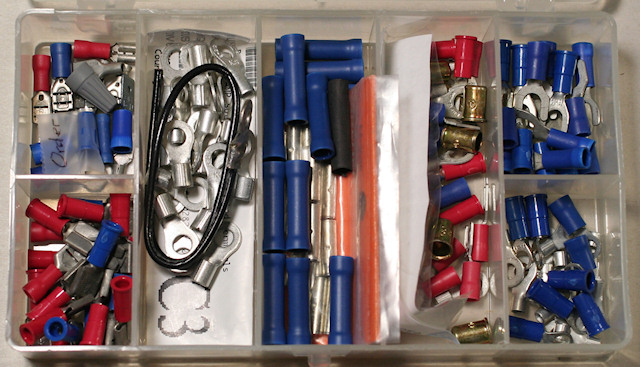 |
| These spade terminals are call "solderless" because they are designed for crimping to wire. Due to crimp failures, I solder after crimping. | Insulation must be removed before soldering and replaced with heat shrink tubing. The bin with the wire has bare connectors used on transformer terminals. |
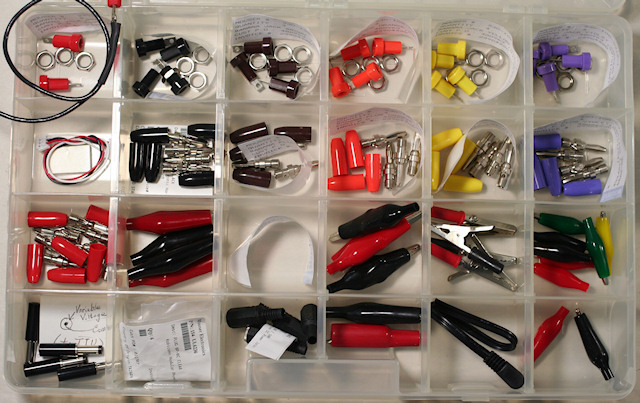
Banana Plugs and Sockets, Alligator Clips, and Clamps are used for larger wires and testing. The covers slip off the large alligator clips for soldering and slip back on when finished. The connectors in the bottom left bin are used to power the MTH DCS TIU.
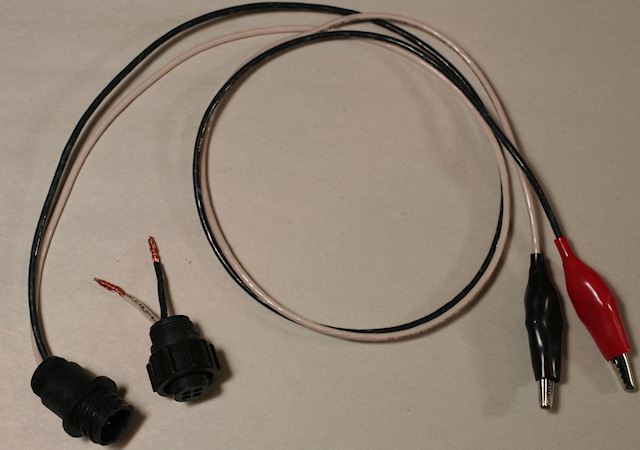
Test rig for CPC connections. (CPC
= circular plastic connectors)
CPC connectors for Power can handle 3 or 7 contacts and 16 to 10
wire sizes.
Wirenuts for Temporary connections -
Wirenuts can be permanent when installed in a project box, junction
box or enclosed control panel.
When wirenuts are installed where they can be disturbed and come
loose, they become a fire hazard. All wirenuts should contain
a metal coil. When connecting different size wires, use pliers
to twist wires together before attaching connector.
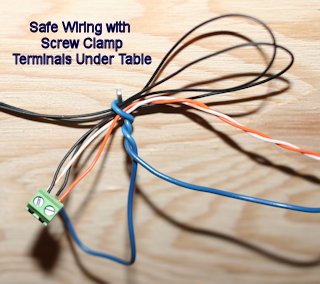
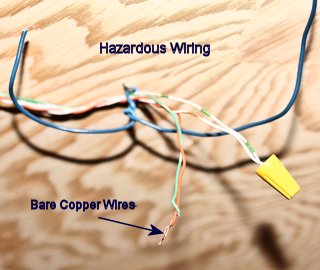
On the secondary (5-20V) side of the transformer, loose connections
and arc faults can burn down your house or building.
(Use correct size wire, make all connections tight, and keep wiring
neat.)
 |
On the secondary (5-20V) side of
the transformer,
loose connections
and arc faults can burn
down your house or building. Loose connections started a fire under a former layout. Wirenuts were used for connecting power to building lights, light poles, etc. Space under layout was used for storage. A large stored item with a light weight plastic drop cloth used as a dust cover disturbed the wiring as item was moved around under the layout. A wirenut got knocked loose and wires loosened with more disturbance. The arcing between the loose wires caught the plastic on fire. Fortunately those tables had no skirts and smoke was discovered before damage occurred. See safe and hazardous connections below. |
 |
 |
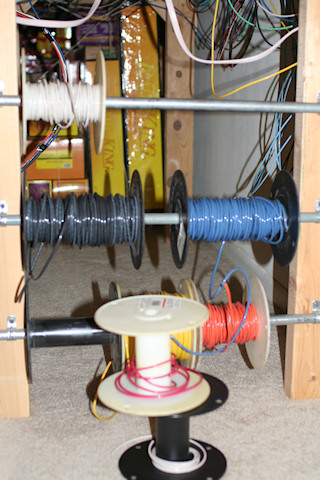
Wire Stand flips over for Rolling.
The red and white wire is #20. Other reels range from #18 to
#14.
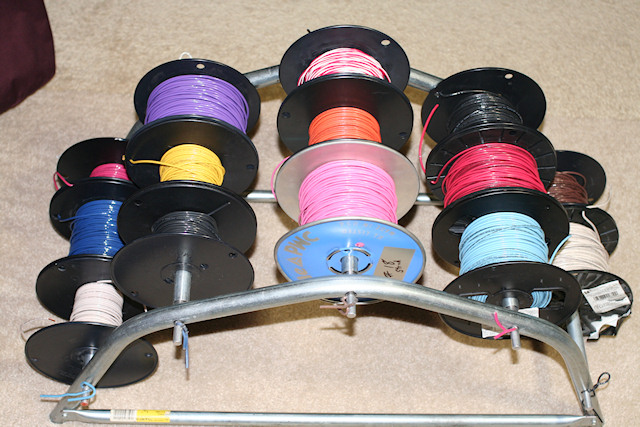
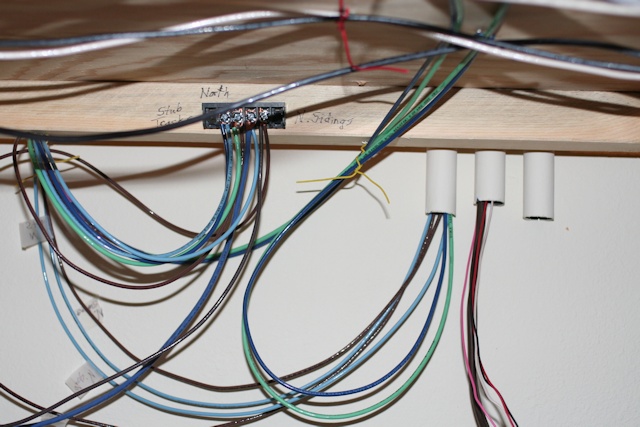
| When pulling wire with long runs, hang 1/2" electrical conduit from 1/2" one hole straps for holding reels in the center of the layout. Pull wire as far as it will be needed (do Not cut). Start terminating where taps will be needed and pull more wire as you terminate on the way back to the reels. Leave plenty of wire at terminations to allow for changes. That's better than having to run a longer wire later if changes are made. |
 |
Wiring is secured with solid scrap wire stapled and used as tie wire. Wires entering 3/4" conduit are going to a wall mounted control panel.
Pancake® Overfloor Raceway
For low voltage (0 - 49 volts) wiring only, use this raceway.

Bus Wiring (how to)
Bus, wire, bar, or strap used to distribute power that is tapped at intervals.
Scenery to Hide Wiring
The Run Room COO's (Chief Operating Officer) policy is "I don't
do scenery".
In the spirit of "There's an exception to every rule", see how
scenery can serve a useful purpose.
| Question? Contact the SSPRR COO (Chief Operating Officer) using the email button to the right. (If email link is absent, please enable JavaScript.) |
|